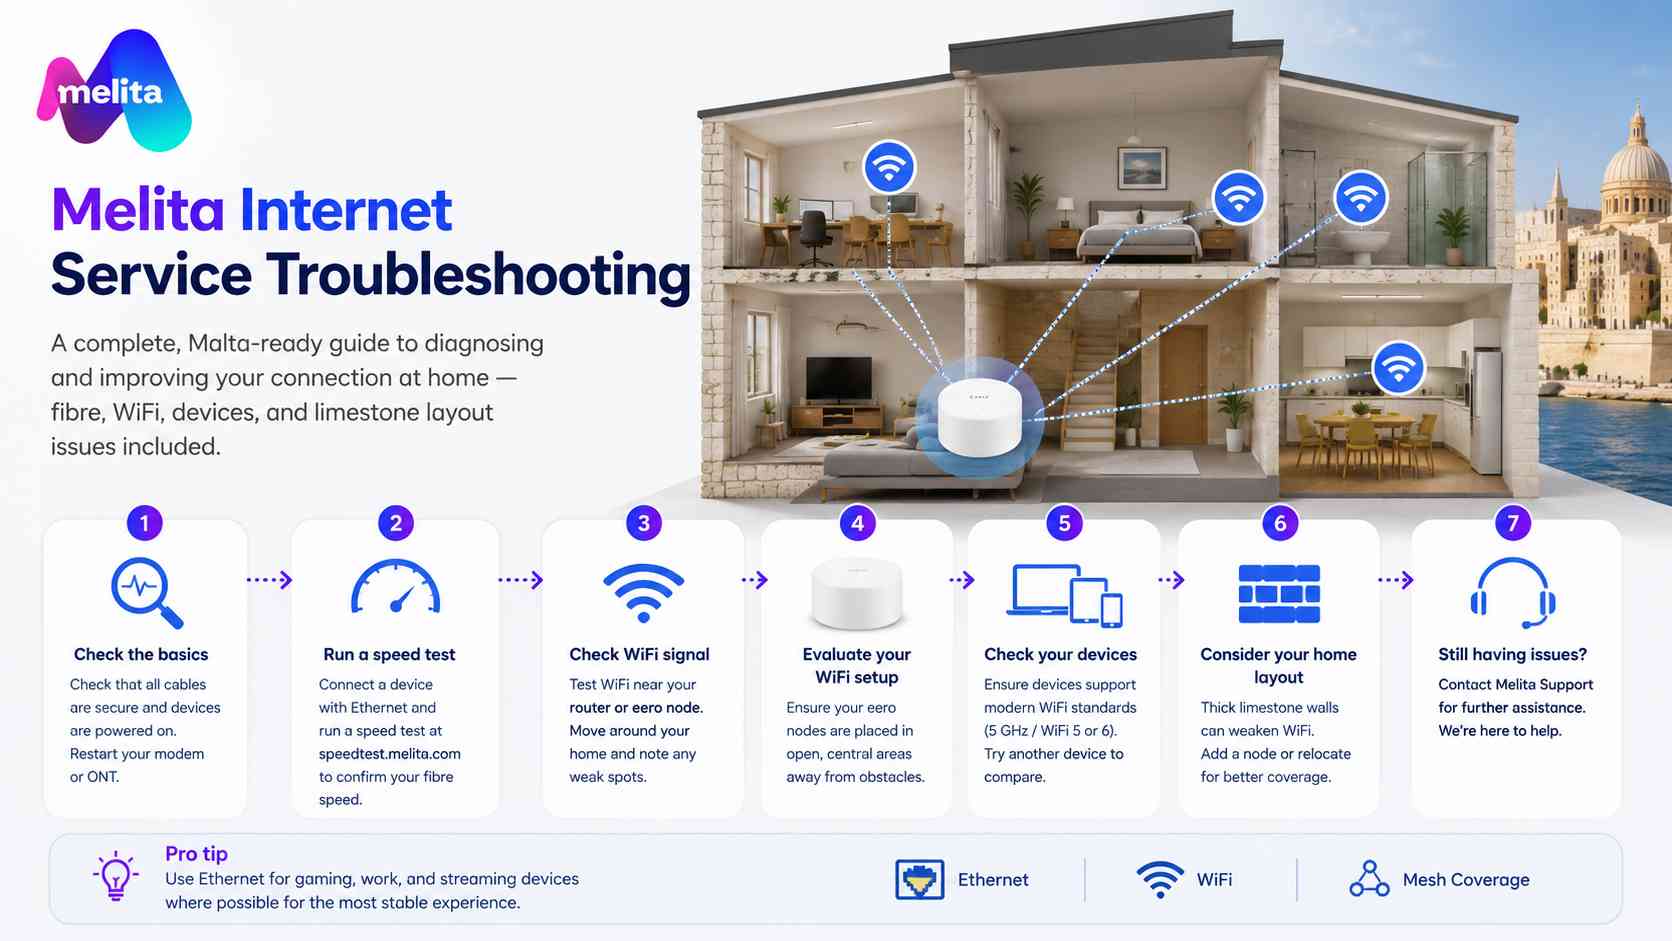
A complete, Malta‑ready guide to diagnosing and improving your connection at home — fibre, WiFi, devices, and limestone layout issues included.
Even with ultra‑fast Melita fibre, your experience at home can vary depending on WiFi placement, device age, household layout, and limestone interference. This guide helps you quickly identify what’s causing slow speeds, drops, or buffering — and shows you exactly how to fix it.
Think of this as your on‑call technician in written form.
First: Understand the Two Layers of Your Home Network
Before troubleshooting, recognise that your home connection has two distinct layers:
Layer 1 — Fibre coming into your home (ISP side)
This is the speed Melita delivers to your router:
- Stable
- Wired
- Not affected by limestone
- Tested using Ethernet
This part rarely has issues.
Layer 2 — WiFi inside your home (your environment)
This is where most problems happen:
- Limestone walls
- Router placement
- Device age
- Interference
- Mesh node spacing
Most “slow internet” issues are actually in‑home WiFi issues, not fibre issues.
This guide focuses on both, starting with the basics.
Step 1 — Test Your Speed Properly
To know what’s wrong, you must test correctly.
A. Test with Ethernet first
This checks your actual Melita fibre connection.
- Connect a laptop/PC directly to the router with a Cat6 cable.
- Run a speed test.
- Compare the result to your plan (250 / 500 / 750 / 1000 / 2500 Mbps).
If Ethernet speeds match your plan
Your fibre is perfect.
Any issues you feel are coming from WiFi — skip to section 3.
If Ethernet is significantly lower
Possible reasons:
- Device Ethernet port is limited to 100 Mbps or 1 Gbps
- Using old cables (Cat5 or below)
- Wrong router port used
- PC/laptop CPU too slow to handle high‑speed tests
- Multiple programs downloading in the background
Fix these before continuing.
Step 2 — Identify the Type of WiFi Issue
Most home problems fall into one of six categories:
- Weak WiFi in some rooms
- Buffering on the smart TV
- Video calls freezing
- Gaming lag
- Smart home devices disconnecting
- WiFi suddenly slows down
Pick your scenario below.
Weak WiFi in Certain Rooms
Most common cause: limestone walls
One limestone wall weakens WiFi.
Two limestone walls almost kill it.
Fix
- Place an eero node between router and problem room
- Move nodes to open spaces, not corners
- Elevate nodes to waist or chest height
- Reduce distances: 1–2 rooms apart maximum
- Keep doors open where possible
- Avoid placing nodes behind TVs, in cupboards, or on the floor
If still weak
The far room needs its own eero node.
Buffering on Smart TV (Netflix / YouTube / IPTV)
Causes
- TV sits inside a cabinet or behind a wall
- TV is far from nearest WiFi node
- TV uses 2.4 GHz instead of 5 GHz
- The TV antenna is low‑power
Fix
- Move a nearby eero node into the same room
- Place the node visible, at chest height
- If possible: wire the TV with Ethernet
- Restart TV WiFi to reconnect at 5 GHz
Pro tip
Many smart TVs connect to the wrong node if placed behind furniture.
Move the nearest eero node into clear sight.
Video Calls Freezing (Teams / Zoom / Meet)
Causes
- Poor upload signal through limestone
- Device too far from eero
- Interference from thick walls or appliances
- Laptop switching between nodes mid‑call
Fix
- Place an eero node in the room where you work
- Stop using the kitchen as your office — fridges kill signals
- Restart WiFi before calls to lock onto best node
- Close other devices/apps doing downloads
- Prioritise your laptop in the eero app (WiFi priority)
Best solution
Connect work laptop to Ethernet or use a USB‑C → Ethernet adapter.
Gaming Lag (Ping Spikes)
Lag is NOT caused by speed.
It’s caused by:
- WiFi interference
- Limestone
- Wireless hops
- Poor node placement
- Device using 2.4 GHz
Fix
- Connect your console/PC with Ethernet
- Or place an eero node in the same room
- Ensure console uses 5 GHz or WiFi 6
- Restart WiFi before gaming session
- Turn off downloads on other devices
- In eero app: Prioritise the gaming device
Avoid
- Playing over WiFi two rooms away
- Using powerline adapters (unreliable in Malta)
- Hiding consoles inside entertainment units
Smart Home Devices Disconnecting (cameras / plugs / sensors)
Cause
Most IoT devices still use 2.4 GHz, which:
- Travels further, but
- Is slower
- Has more interference
- Struggles with thick walls
Fix
- Ensure eero nodes are placed closer
- Set up devices in the same room as the nearest node
- Disable “private MAC” temporarily during setup
- If the device supports 5 GHz (rare), force it near a node
For WiFi cameras
Place a node in direct line of sight.
WiFi Feels Slow or “Drops” at Random Times
Likely causes
- Device switching nodes
- Interference from appliances
- Thick stone causing inconsistent signal
- Node placed too far from previous node
- Hidden placement reducing signal flow
- Too many devices on 2.4 GHz
Fix
- Move nodes closer together (1–2 rooms)
- Raise nodes higher (shoulder level works best)
- Keep nodes in the open
- Restart WiFi on your device
- Turn off older devices that hog bandwidth
- Run a walk‑test (section 13)
If everything slows at once
Check if:
- A device is downloading a huge file
- Someone is uploading large videos/photos
- A gaming console is auto‑updating
- A cloud backup kicked in
Limit or schedule large uploads overnight.
Identify Device‑Related Issues (Not WiFi‑Related)
Old phones/tablets
Older radios = slower WiFi.
Laptops with old WiFi cards
Anything pre‑2017 may struggle with speeds over 200–300 Mbps.
Smart TVs
Low‑power WiFi antennas cause buffering unless an eero is in the same room.
Work laptops
Corporate VPNs reduce speeds — not your home WiFi.
iPhones on low‑power mode
Speed drops significantly.
Fix
Update devices, disable battery saving, or use Ethernet.
Check Router or eero Node Placement Mistakes
Avoid placing nodes:
- Behind a TV
- Inside media cabinets
- Under a table
- On the floor
- Behind stone pillars
- Next to fridges or microwaves
- In deep window sills
- Too close together
- Too far apart
Correct placement is the #1 WiFi fix in Malta.
When to Add Another eero Node
Add a node if:
- A room shows persistent weak speeds
- A bedroom is behind two limestone walls
- Upstairs always drops
- Calls fail in one area
- Smart TV buffers
- Corridor layout is long
- House is multi‑wing (townhouse, farmhouse)
Mesh networks are designed to scale room‑by‑room.
The “Walk‑Test” — The Ultimate WiFi Fix in Malta
This takes 3 minutes and solves 80% of issues.
- Stand next to Node A → speed test.
- Move to Node B → speed test.
- Move to Node C → speed test.
- Walk the corridor/stairs → watch signal drop points.
- If a handoff zone is weak, move nodes 1–2 metres and retest.
- Check your key usage rooms at peak time (evening).
- Fine‑tune until stable.
Aim for consistency, not a perfect number.
Fibre Is Stable — WiFi Needs Tuning
If Ethernet tests show the speed you pay for, your fibre line is perfect.
WiFi inside a Maltese limestone home requires:
- good placement
- possibly multiple nodes
- modern devices
- some trial‑and‑error
- the right expectations
Your fibre connection is the motorway.
Your WiFi is the local road network.
Make both strong, and your home becomes fast everywhere.
When to Contact Support
Contact Melita support if:
- Your Ethernet speed is consistently low
- Connection drops even on wired devices
- Router lights show errors
- Fibre termination point is damaged
- A sudden drop occurred without any home changes
These are signs of a potential line or hardware issue.
Summary — Your Troubleshooting Blueprint
- Test Ethernet → fibre confirmed
- Test WiFi near nodes → placement confirmed
- Walk‑test → find weak points
- Fix node positioning → open, high, visible, closer
- Fix device problems → 5 GHz, modern radios, Ethernet
- Resolve household issues → heavy downloads, interference
- Add nodes → solve limestone obstacles
- Use eero app → manage settings, optimise, prioritise
- Contact support only after confirming Ethernet issues
With these steps, any Maltese home — apartment, maisonette, terraced house, townhouse, or farmhouse — can achieve fast, stable, whole‑home WiFi.